Wednesday, October 24, 2012

Winterizing Your Lawn


Don't wait too late to winterize your turf for the upcoming winter season. Just about now winter weeds will start germinating. If you wait too late to apply your pre-emergent then these vigorous weeds will take root and create havoc in your lawn.

Most of us do not really understand how a pre-emergent works. When you spray or apply in granular form a pre-emergent, that product turns into a gas layer right above your dirt. When a weed seed germinates, the tender plant hits this gas layer and mutates and then dies. This is why it is so important to apply your lawn chemicals at the right time. Once a weed has germinated and starts growing and then you apply your pre-emergent, its to late. Of course, never fear, you can always apply a post-emergent that will kill existing winter weeds.
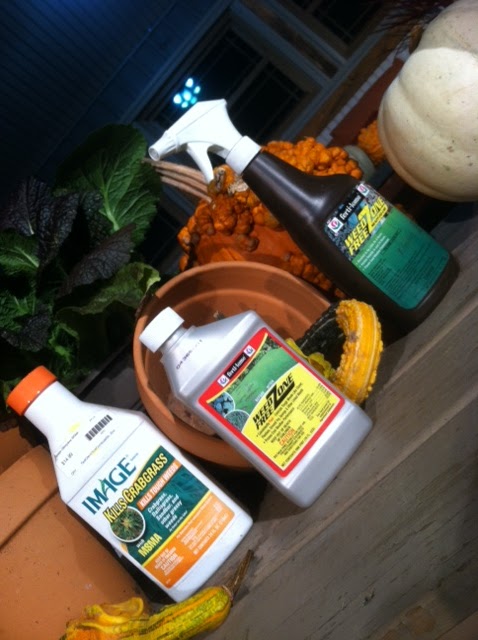
With chemical to use?? Just go to your local garden center and ask a garden expert. Make sure you come with important information such as what kind of turf you have and the square footage of your lawn area. Also, double check and read the directions on the bag to make sure it really is the product you need.


Live Life to the Fullest,

Chris

Cool Flowers for Cool Weather


I don't know about your yard but mine is looking a little tired. The summer season and the intense heat just added to the exhausting look of my annuals. The good news is that it is time to refresh your seasonal color with lots of  coloful winter choices. It's not just about pansies any more. If you mix and match your selection with great and easy growers such as dianthus (great bright colors), the snapdragon, different kales such as the Peacock Kale, or perhaps the new Emperor Ornamental Cabbage series, you got one great new look. Herbs make for great winter color and text as well. Grow the big leaf Sage, lavender, Variegated Oregano, Silver and Lemon Thyme and the Curled Leaf Parsley.

Of course, pansies still are a must. Try the the new variety called Cool Waves. It is all the rage right now. Why?? Because it grows as a ground cover and blooms it's heart out all fall, winter and into early spring. Cool Waves come in so many colors but I prefer to mix the colors for mass impact. Whatever variety you decide to choose, remember to fertilize when you plant with Blood Meal and then apply a slow release fertilizer such as Shake and Feed by Miracle-Gro.


Live Life to the Fullest,

Chris

Wednesday, October 10, 2012

Winter Containers


Give your yard and patio a make over this fall by simply replanting your containers with some winter hardy evergreens. All you have to do is start with some of the taller plants in the back and staircase  them down to the front of the pot with an assortment of evergreens.  (check out my blog on hearty winter evergreens!)  Remember it is not about symmetry but about balance. Your potted containers do not have to match on both sides of your front door or where you choose to put them. Just place one large pot on one side and on the other side of the door place two pots, one mid-size and one smaller size.

Add some color with your evergreens such as the new Cool Wave pansies. These trailing pansies will fill more garden space and drape the sides of your pots. Load with flowers, Cool Wave pansies come in an assortment of colors. Add ornamental kale such as my favorite variety the Peacock Kale, ornamental cabbages, and evergreen herbs for interested and texture.


Saturday, October 6, 2012

Minature Gardens


No excuses!!! Even if you live in an apartment or a small loft you can now have your very own landscaped garden. Why not create your own miniature garden? You read it right.... There are so many different miniature garden accessories that you can design your own indoor yard. Your can incorporate miniature arbors, fences, houses, fountains, pots, urns, and even light fixtures. Have fun and create the yard of your dreams with no maintenance at a fraction of the cost of a real outdoor landscape

Perfect Pumpkin


Now that it is October (I can't believe it is fall already!!!) most of you are probably thinking about decorating your porch and inside with lots of pumpkins. Remember autumn is about harvest so load up on all the different varieties of pumpkins and gourds that are currently on the market. Mix it up and add pizazz by incorporating other autumn accessories such as Terra Cotta aged pots, old outdoor antiques and tools, corn stalks and even firewood. Jhemajanged (my own word...lol) together, these items will give your home a warm fuzzy vibe for this fall season.


Here are some of my favorite varieties of pumpkins: Kamo Kamo, Autumn Cup squash, Lumina pumpkin, Jarrahdale pumpkin, Peanut pumpkin, the big Prizewinner pumpkin, Fairytale and the Cinderella pumpkin, and of course the old fashion Jack-O-Lantern. The more, the better when it comes to pumpkins and gourds.

Wednesday, September 26, 2012

Haunting Potion Bottles


Make your coffee table, console table, or any surface with a tray fun and "scary" with some of these "custom" made potion bottles. This one is especially fun to do with the kiddos!!  All you have to do is find an assortment of different clear glass bottles and then simply pour  black acrylic paint into each one. Swirl the paint around until the entire inside is the color black. Pour out the excess paint. (If you are going to use the potion bottles for food or cut flowers, then just spray paint the outside of the glass bottle or jar with black spray paint.) Create your own labels with construction paper in different colors and write with different color markers. You can also make your own labels on the computer and let your imagination go crazy. The scarier the label the better!!!  Mummy Jars are so darn cute and SO easy to create. All you do is wrap any size glass jar with lots of rubber bands in all different directions. Make sure you leave plenty of exposed glass. Then spray paint with white spray paint. Let dry for about 2 hours. Take a sponge brush and paint two black eye balls with acrylic paint. Also add some eyebrows. Fill with Halloween candy for the touch of sweetness to an otherwise scary mummy.


Now, take those haunting bottles and display them on a tray and add other elements such at artificial black roses, etc.

Pumpkin Terrarium


Most of us are all familiar with planted terrariums but have you ever heard or seen a pumpkin terrarium? All you have to do is take a large glass terrarium or for that matter, a small fish tank and even a large glass clear bowl, and layer it with one layer of green sheet moss, then a layer of gourds or small boo pumpkins and then another layer of moss and so on. Be creative and try not to make each layer level but instead create valleys and hills with each level. You can even add other elements such as an old small branch or two for more drama and texture.

Saturday, September 22, 2012

Spooky Pumpkins


Make your Halloween a "spooky" one with scary owl and eyeball pumpkins. Chris will show you how with a little paint and a few supplies you can create your own individual pumpkins that will had fear to your Halloween decorations.


Make your Halloween a "spooky" one with scary owl and eyeball pumpkins. Chris will show you how with a little paint and a few supplies you can create your own individual pumpkins that will had fear to your Halloween decorations.

Instructions:

Hoot’n Owl Pumpkin


You will need:

8” artificial pumpkin

Yellow sunflowers

2 large wiggle eyes

Assorted fall leaves – we used maple leaves for the eyes
And slender elongated fall leaves for the wings

Paddle wire

1 large pinecone

1.5” yellow cardstock

Hot glue gun and glue sticks & Pliers


1.      For each eye, glue a wiggle eye in center of a flower. Cut petals shorter with scissors and glue eyes to pumpkin. For eyebrows, glue a maple leaf behind each eye.

2.      For beak, hold cardstock square at opposite corners, and fold into a cone shape, glue to hold, then glue to pumpkin between eyes.

3.      For each wing – gather 3 long leaves and wind wire tightly around them to hold them together. Cut off ends just past the wire. Poke a hole in each side of pumpkin with scissors and insert wing, glue in place.


Spooky Eyeball Pumpkin


You will need:

8” artificial pumpkin

Gloss acrylic paints – white, purple, red, black

Tulip Glow in the Dark Dimensional Paint

Paintbrushes – fine line, medium, and fan brush, and sponge brush.


{If you buy a white pumpkin you can skip Step 1}


1.      Use sponge brush to paint your pumpkin white. You may need several coats, if so, allow to dry between coats.

2.      Use medium brush and purple to paint circle in the middle of the pumpkin.

3.      Use liner brush and black paint to outline eye. Then paint center of eye.

4.      Use liner brush and red paint to make veins outside the iris.

5.      Once all is dry, use glow in the dark paint to highlights veins.  On iris, outline the center of the eye. Use fan brush to pull paint out from the center into the purple area.


{Do not spray paint your artificial pumpkin, as the paint will cause the pumpkin to peel, crack or melt.}


Potted Pumpkins


Add a twist to your fall decorating. Create your very own "Potted Pumpkins". All you have to do, is take a container,  plant it with green ivy, and then simply sit a pumpkin on top! So easy!!  This will give the illusion that the pumpkin is growing on the vine. If you have or can find a Terra Cotta pumpkin that looks carved, then just add a light in it and place that on top of the potted ivy. Placed on a timer, your pumpkin will glow at night with out any real flame. I find that variegated creeping fig, pothos, or any houseplant vine, will work just as welll.  Even a hanging basket of blooming petunias can work and add a hint of color to your autumn display!  The most important thing to remember is to have fun!


Autumn Brunch


Be original and create your own brunch for the fall season. Use a muffin tin to hold an assortment of fall goodies such as jam, pieces of biscuits or some kind of roll cut into smaller sizes, fresh fruits, figs, etc. What ever you want makes for a perfect display that not only looks great but taste so good.

Even a round cake pan makes for a perfect container to house autumn snacks. If you can fine a cake tin in the shape of a pumpkin or leaf!!  Look around you will be amazed at what you can find!


Saturday, September 8, 2012

Perfect Fall Wreath

It's time to start decorating for fall!!  I can't wait for the cooler temperatures, it's ONE of my favorite times of year!   As a matter of fact, this week I am getting my front porch cleaned and ready for pumpkins, etc. While I wait for them to arrive, I can put up my fall wreath.  When it comes to decorating for autumn, remember to be different and chose that perfect wreath that is unique and may be a little fun.  You can use a berry wreath, but what about one that is covered in green foliage and a snake.  Scary,  yes.......  Or something more elegant like a wreath made entirely from silk white gourds.  The possibilities are endless.  But it's time to get that wreath now or create one yourself before the good stuff is gone.....  Have fun....